
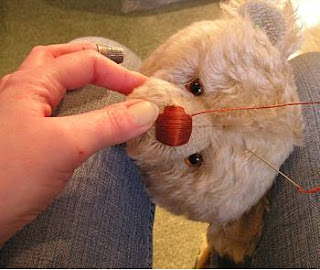
 I've been in my sewing room, working on my new bear again this afternoon. I thought I'd share his progress with you after the nose pics suddenly inspired a sense of direction for my blog and after taking yet more photos on my trusty digicam today, it dawned on me that I hadn't shown you how to insert his eyes! So, my apologies for that ommission, but as I confessed in an earlier post, I do tend to have a bit of a butterfly mind on occasion. Maybe I'll flit back to eyes another time ...
Before we get started on fixing the head to the body, here's a pic of the tools I'll be using. I like to use two separate pairs of pliers for jointing, a round nose pair and a flat nose pair. The joints for this bear are traditional hardboard discs held in place with split pins and washers in the head and arms. I use nuts and bolts in the legs for extra strength. You can see a stuffing stick in the photograph, which is self explanatory, a tape measure and a thin headed chisel, which I use to make the holes in the hardboard discs slightly larger to accommodate heavy duty split pins and bolts. The phillips screwdriver and ratchet thingy are to tighten to nuts and bolts. I'll explain the wadding when we get to assembling the arms and legs.
Now, that's the boring bit done, so let's get to the good stuff ...
Head first!
Oops, just realised I forgot to include the awl in the tools photograph .. good job I'm not writing a book here!
This bear will have his head attached using a traditional method of jointing.
 I use the pointy end of the awl to make a small hole in the centre seam of the bear's chest, about quarter of an inch from where it meets the back. This is where the bear's head will be inserted.
 Here I'm inserting the split pin at the base of the bear's head into the hole I just made with the awl.
This bear is going to need a 2.5" hardboard disc to give his head the right amount of support. Here I'm slotting the disc over the split pin which is now poking through into the bear's body.
 I've added a steel washer over the split pin to protect the disc before I use the round nose pliers to begin tightly curling one side of the pin.
I find the flat nosed pliers work best to finish curling the split pin securely.

Once it's curled tightly on one side of the pin. I repeat the process on the other. It's important to get this as tight as possible to hold the head steady for years to come.
 And it really is as simple as that! Freddie's head is now securely attached to his body and he's waiting patiently for his arms and legs ...


