
Noses of Distinction
As anyone who knows me will tell you, I have a soft spot for the Chiltern Hugmee teddy bear and have had a love affair with them for many a long year. In fact, I was a collector of these beautiful English teddy bears, long before I ever created a bear myself!
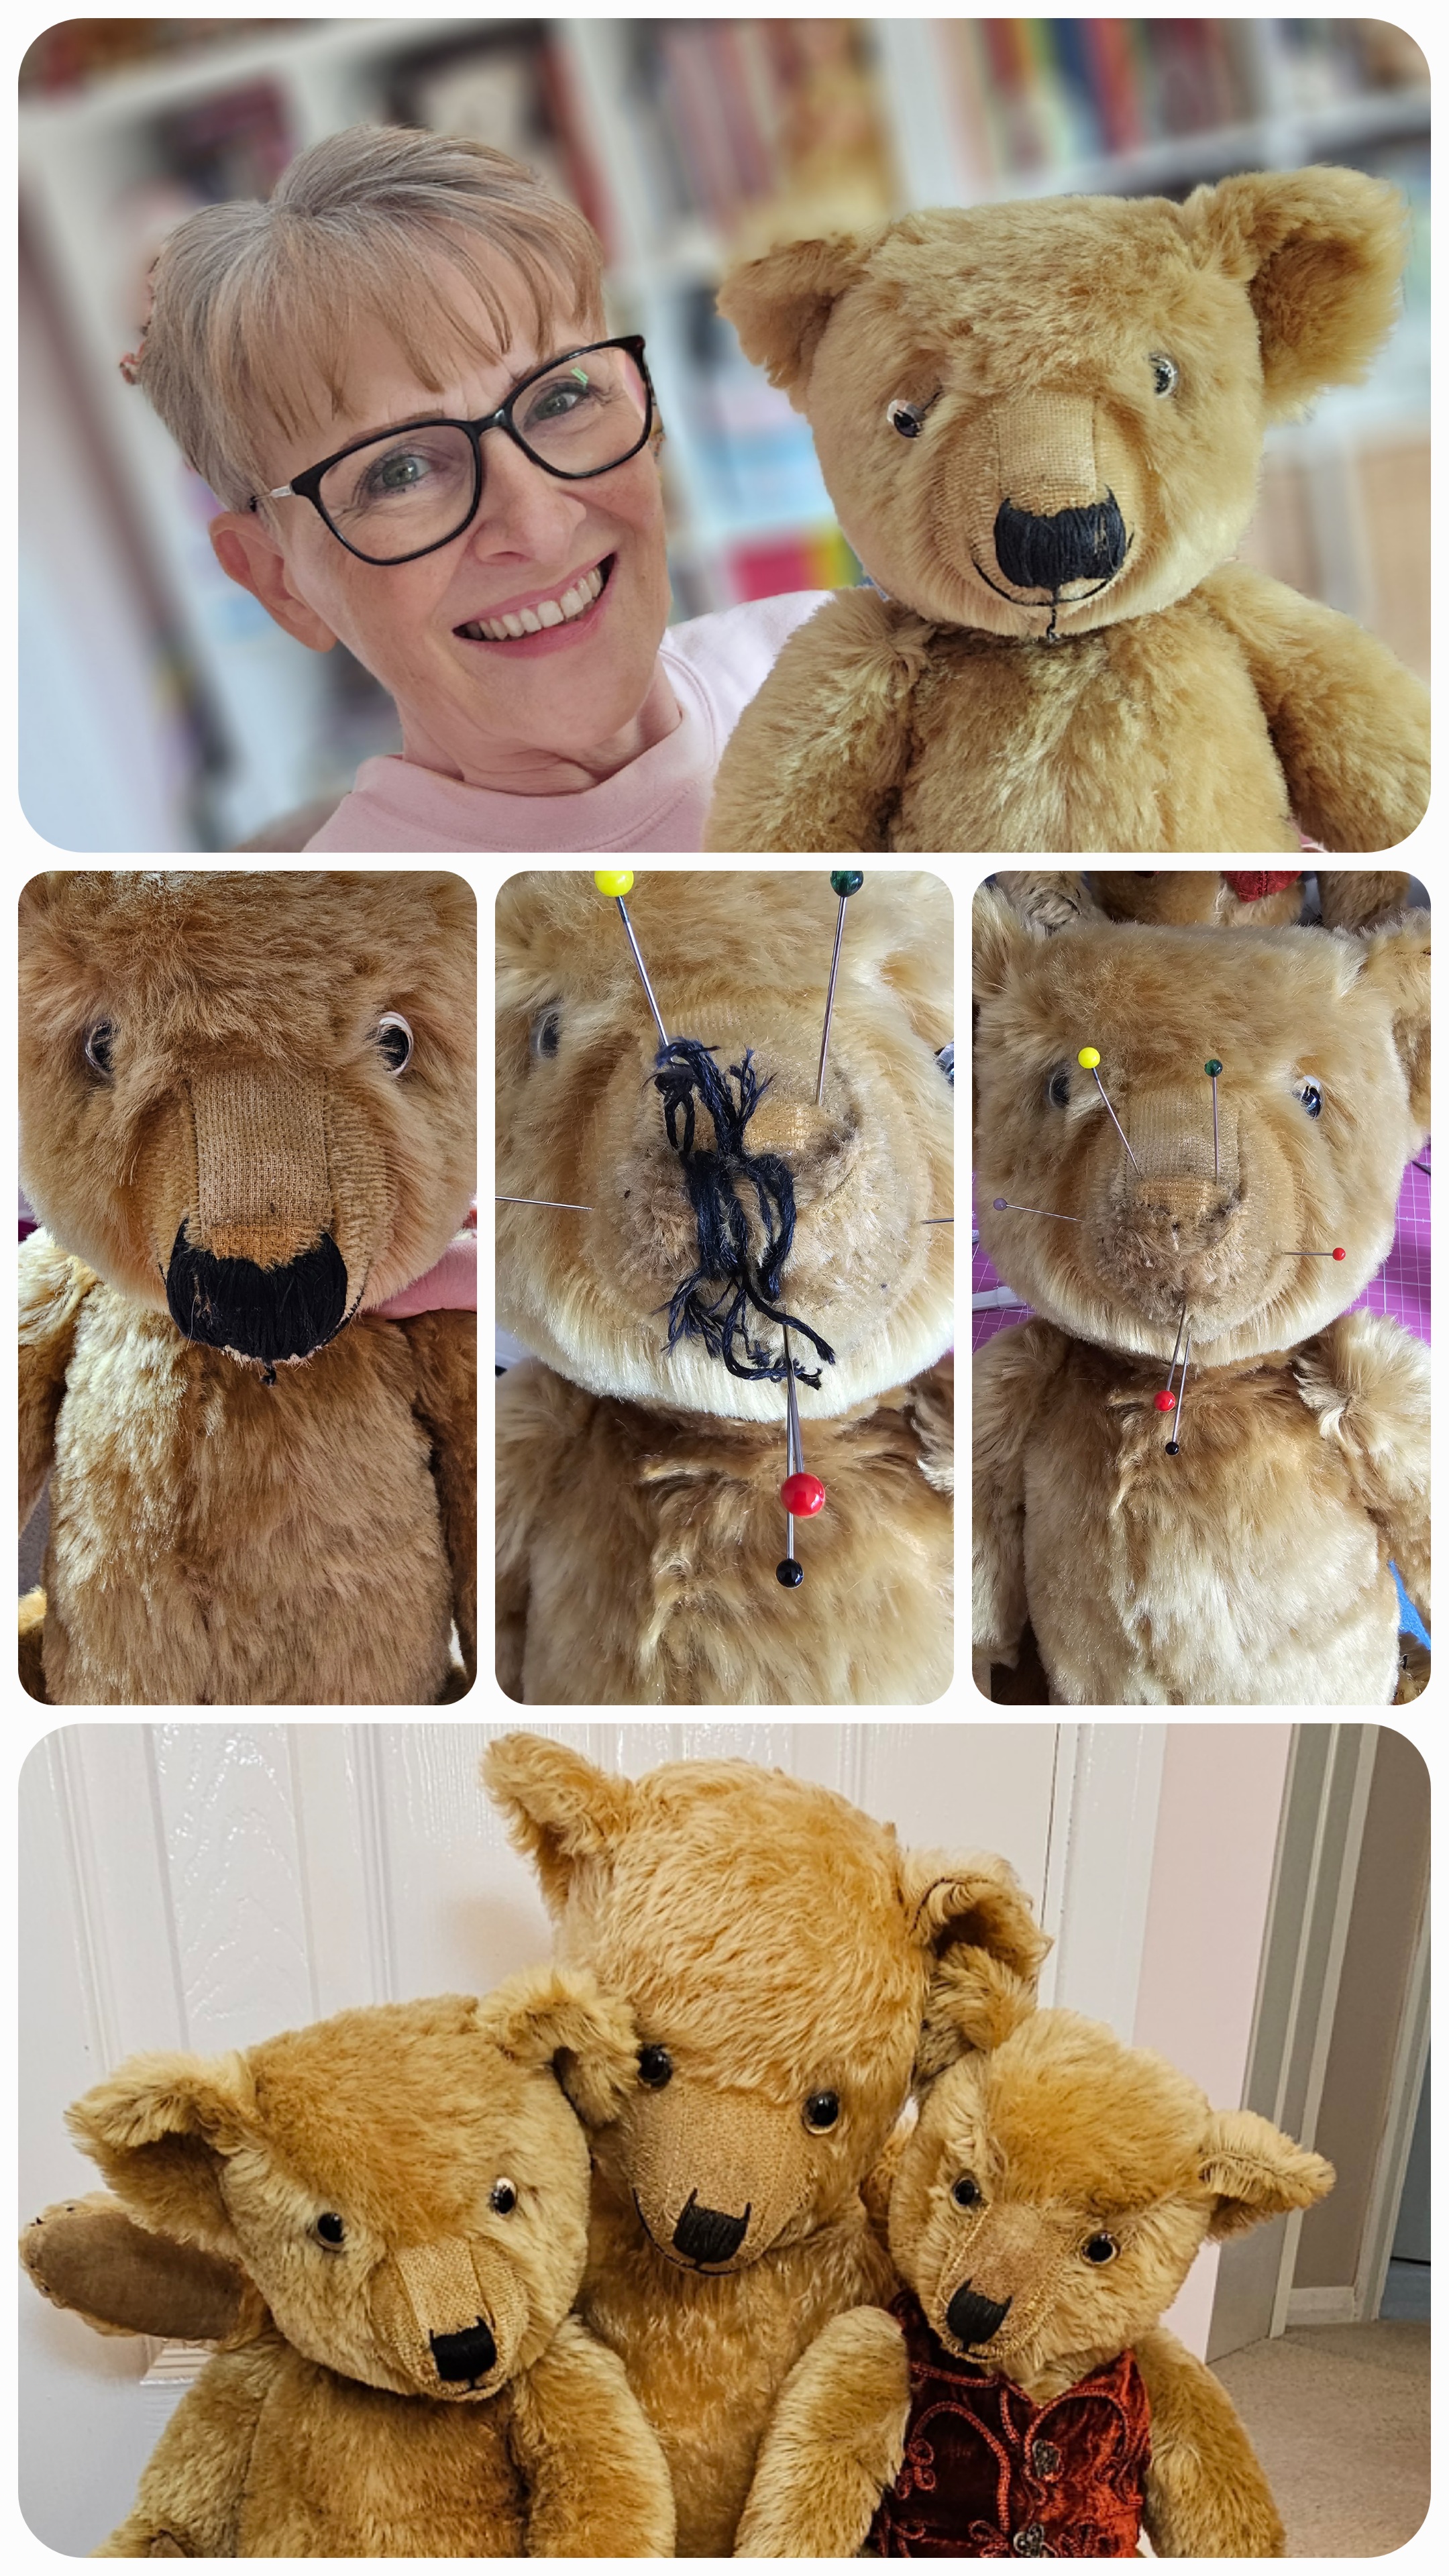
My collection, or rather family of Hugmees, began with my first teddy bear in 1964, a fine 20", 1950's design, named 'Big Ted'. He has stayed with me through the ups and downs of life and is with me still. There have been a fair few more adoptees over the years, the most recent of which arrived with me a couple of weeks ago. He was made in the 1930's by the Chiltern Toy company and has pristine mohair, unaffected by the passage of time; still dense, rich in colour and absolutely glorious ... the kind of mohair to make any bearmaker's heart beat a little faster! However, this poor chap had a nose to rival the most bulbous of noses, probably over-stitched more with love than skill, by a previous owner. He also arrived quite typically, with a loose glass eye ... but a small operation will soon fix have that safely secured.
The nose was another matter entirely. I initially wondered if I could live with it, but after researching further to find similar examples of 1930's Chiltern Hugmee teddy bears with their original noses intact, I decided it really had to go! A nose is one of the defining characteristics for any self-respecting teddy bear of course, but for the 1930's Chiltern it was especially important. The 1930's Hugmee was granted a splended vertically hand-embroidered nose, with two end stitches sweeping elegantly upwards. It was a fine, distinguished teddy bear nose, a nose of great distinction, making its manufacturer instantly identifiable. My new arrival was in need of an upgrade if he was ever to grace the teddy bear toy box, alongside his Hugmee contemporaries.
So, out came my stitch ripper and my determination. I pointed a spotlight at bear's hooter and carefully took out each of the many loose stitches, together with what remained of his mouth thread. As I did so, I used pins to mark where the fabric colour had changed over the years, providing a useful clue for the original line of nose stitching and mouth placement. Unfortunately the thread I used was slightly thinner than the original embroidery thread, but with careful sewing I managed to recreate a much neater new nose for teddy, far more in keeping with the appropriate 1930's Chiltern Hugmee nose. I may re-do this nose at some point, as I would have preferred the two end stitches to be a millimetre or two longer than I made them but all in all, not a bad job and after taking a photograph with two new pals, both original 1930's Chiltern Hugmee teddy bears, it is clear to see this nose is without doubt, far more sympathetic to the original 1930's shape and placement.
If you would like to read more about the Chiltern Toy Company, here are a few links:
https://allbear.blogspot.com/2011/09/challenged-part-2.html
https://allbear.blogspot.com/2007/12/once-upon-design.html
https://allbear.blogspot.com/2008/08/making-chiltern-memories.html
https://www.teddybear-museum.co.uk/collections/chiltern
https://cheshammuseum.org.uk/exhibitions/chiltern-toy-factory/
https://www.bourtonbears.com/bears-chiltern.php
My collection, or rather family of Hugmees, began with my first teddy bear in 1964, a fine 20", 1950's design, named 'Big Ted'. He has stayed with me through the ups and downs of life and is with me still. There have been a fair few more adoptees over the years, the most recent of which arrived with me a couple of weeks ago. He was made in the 1930's by the Chiltern Toy company and has pristine mohair, unaffected by the passage of time; still dense, rich in colour and absolutely glorious ... the kind of mohair to make any bearmaker's heart beat a little faster! However, this poor chap had a nose to rival the most bulbous of noses, probably over-stitched more with love than skill, by a previous owner. He also arrived quite typically, with a loose glass eye ... but a small operation will soon fix have that safely secured.
The nose was another matter entirely. I initially wondered if I could live with it, but after researching further to find similar examples of 1930's Chiltern Hugmee teddy bears with their original noses intact, I decided it really had to go! A nose is one of the defining characteristics for any self-respecting teddy bear of course, but for the 1930's Chiltern it was especially important. The 1930's Hugmee was granted a splended vertically hand-embroidered nose, with two end stitches sweeping elegantly upwards. It was a fine, distinguished teddy bear nose, a nose of great distinction, making its manufacturer instantly identifiable. My new arrival was in need of an upgrade if he was ever to grace the teddy bear toy box, alongside his Hugmee contemporaries.
So, out came my stitch ripper and my determination. I pointed a spotlight at bear's hooter and carefully took out each of the many loose stitches, together with what remained of his mouth thread. As I did so, I used pins to mark where the fabric colour had changed over the years, providing a useful clue for the original line of nose stitching and mouth placement. Unfortunately the thread I used was slightly thinner than the original embroidery thread, but with careful sewing I managed to recreate a much neater new nose for teddy, far more in keeping with the appropriate 1930's Chiltern Hugmee nose. I may re-do this nose at some point, as I would have preferred the two end stitches to be a millimetre or two longer than I made them but all in all, not a bad job and after taking a photograph with two new pals, both original 1930's Chiltern Hugmee teddy bears, it is clear to see this nose is without doubt, far more sympathetic to the original 1930's shape and placement.
If you would like to read more about the Chiltern Toy Company, here are a few links:
https://allbear.blogspot.com/2011/09/challenged-part-2.html
https://allbear.blogspot.com/2007/12/once-upon-design.html
https://allbear.blogspot.com/2008/08/making-chiltern-memories.html
https://www.teddybear-museum.co.uk/collections/chiltern
https://cheshammuseum.org.uk/exhibitions/chiltern-toy-factory/
https://www.bourtonbears.com/bears-chiltern.php


.jpg)


